Letter Confusion and Reversals: Why do they occur and how can we help students overcome them?4/5/2021
I had a big “ah hah!” moment when I recently reread Stanilas Dehaene’s book Reading and the Brain: The New Science of How We Read. In a chapter titled Reading and Symmetry, Dehaene, a French scientist who researches the neural basis of reading (among other things), explains why students often confuse letters such as b / d or d / p and sometimes read and spell words in reverse. It seems printing letters and words in reverse and reading certain words seemingly backwards typically has nothing to do with visual perception or visual memory. Rather, these things most often have everything to do with something called mirror generalization. Human brains Like all animal brains, human brains have evolved in relationship to their environment and physiology. Because we live with gravity, our brains can quickly realize that up is very different from down. Also, because our eyes are fixed in the front of our head, our brains know that ahead is very different than behind. But what about left and right? Consider these three objects, which are presented in Dahaene’s book. Do you recognize them instantly? Did you initially notice they were spatially backwards? In real life they appear this way: Mirror generalization Mirror generalization (sometimes called mirror invariance) arises from our body’s symmetrical nature and can be defined as the brain’s ability to recognize objects regardless of their spatial orientation. Imagine you are walking through a tropical forest and you come upon a bunch of monkeys. Some of the monkeys face you, some face away, some are on your left, others are on your right, and a few hang upside down from tree branches. Regardless of their spatial orientation, you instantly recognize all of them as monkeys. Why? Mirror generalization! Through this generalization, our brains automatically recognize an object regardless of how it is spatially presented. A natural function found in children as well as adults, mirror generalization saves us time and energy and helps us survive. In other words, your brain doesn’t care if a tiger, for example, is leaping at you from the left or the right. You brain’s only concern is to instantly recognize the thing as a tiger and then trigger a response in your body – RUN! The same effect holds true if the object is a city bus and you’re stepping out from the curb – STOP! When it comes to letters and words, however, an object rotated in space is not always the same thing. For example, consider this object - b. In the reading world, this object is the letter b and it represent the /b/ sound. Flip it and it becomes something different. Now it’s the letter d, representing the /d/ sound. Rotate it and it becomes something different again, the letter p. Mirror generalization is why many young children often confuse d / b and may read was as saw or spell stop as post. Simply put, they have not yet learned to suppress their brain’s tendency to register rotated letter forms and reversed letter sequences as the same object. Here’s a Dahaene quote from a section of Reading and the Brain. Specifically it’s about dyslexia but it references all students. The underlining is mine: “As a matter of fact, letter orientation does pose specific difficulties for large numbers of dyslexic children, who often confuse “b” with “d.” However, these are problems that are present in all children and not just dyslexics…Furthermore, mirror errors peak at between seven and ten years of age, when children learn to recognize letters, and then vanish.… Visual difficulties do not seem to play a dominant role in most of them.” (page 295). Unlearning is the new learning To learn that an object in one orientation is a b, another a d, and in a third a p, children must unlearn mirror generalization. But this process of suppression (or unlearning) does not happen naturally. How does it happen? Like the unnatural act of reading itself, most children unlearn their tendency to see a d as a b and was as saw through the efforts of teachers. Through teacher instruction, the brains of students are subtly rewired and mirror generalization, at least when it comes to letters and words, is suppressed or unlearned. In the end, emerging readers and spellers are able to at first intentionally discriminate and later automatically discriminate between mirror letters like p / d and words like stop/ post , was/saw, and net/ten. How can we helps students? When it comes to helping students turn off their mirror generalization for letters and words, there are a number of things we can do, especially for students who have brain wiring that is resistant to suppressing or unlearning the tendency. Here are some suggestions, many of which are described and explained in my new Corwin book, How to Prevent Reading Difficulties, PreK-3: Proactive Practices for Teaching Young Children to Read. You can also find video examples of many of them on my YouTube Channel: https://bit.ly/MWLit_YT_Channel
A Final Thought Here’s why I used the words typically and most often in my opening paragraph. Earlier I gave this Dahaene quote, “…Visual difficulties do not seem to play a dominant role in most of them.” But Dahaene goes on to say this about some students identified as having dyslexia: “In a few rare cases, however, left-right confusion does seem to be the true cause of dyslexia.” (page 295). It seems one can’t completely rule out left-right confusion and mirror generalization as the root cause of dyslexic behavior in a very low number of students. If you are teacher who works with a student who is not responding to intense, frequent, and long-term reading interventions (such as Orton-Gillingham, LiPPS, or Barton), a team meeting and possibly more assessment are in order. Sources/Citations
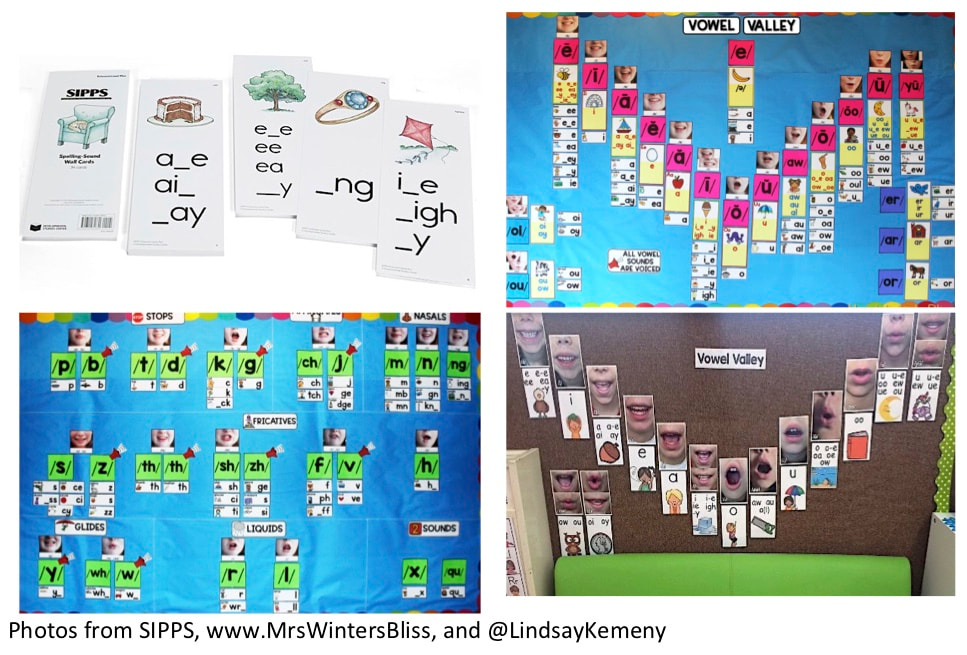
An editor friend recently alerted me to an Instagram posted by a teacher excited to unlearn an old habit. Previously the teacher had only presented letters to her young students and then asked, “What sound does the letter ___ make” and “What sound does this letter say?” Now her instruction often includes presenting a sound and then asking, “How do we spell the ____sound?” “Unlearning is the new learning” is a catchy phrase that reminds us it’s a good idea to replace old ways of thinking with new ones linked to more effective reading and spelling instruction. It’s great to hear of a teacher’s willingness to rub out old routines and replace them with new ones, and I include myself here. I’m glad my stubborn brain is still capable of leaving a rut and heading off in a different direction. In terms of brain circuitry, the processing areas that lead to reading are these: meaning, sound, and spelling. The language pathway (connecting meaning and sound) is one that wires itself and wires itself early. Sure, adults help strengthen this pathway as they interact with infants and young children, but no adult has to directly and explicitly teach a child to hear spoken words and associate them with meaning. On the other hand, the reading pathway must be wired and it is typically wired by teachers. Enter effective instruction. Any teacher exited to ask her students the question “How do we spell the ___ sound” is absolutely on the right track because letters were created to represent discrete sounds of language, not the reverse. Knowing that speech knowledge comes before print knowledge, it makes sense to teach sound-letter associations just as often as letter-sound associations. Also and importantly, when working with some reading disabled students, we may need to teach sound-letter associations very frequently and over a long stretch of time. A quick story: while proof-reading my new Corwin book, How to Prevent Reading Difficulties, PreK-3, I had an extended conversation with my copy editor about whether to use the term sound-letter association or letter-sound association. In my chapter on activities for teaching orthography, I had toggled back and forth between the phrases but to avoid confusing readers, we felt it best choose only one. I dearly wanted to use sound-letter because the term reflects the sequence of skill acquisition, #speechtoprint. But after scanning a slew of articles and websites, I clearly saw the most commonly used term was letter-sound association. As far as I could tell, Louisa Moats was the only researcher to semi-regularly use “sound-letter association” when talking about teaching young children the alphabetic principal. And so I decided to go with letter-sound. So much for unlearning! Looking back on it, I should have chosen sound-letter association. I could have been a trend setter! And I should have included more information on how to use sound walls to teach spelling-phonics. Hence this post. I first learned of sound walls (as opposed to word walls) about 15 years ago during a LETRS training (Louisa Moats and Voyager-Sopris). Sound walls are bridges, helping students cross from speech to visual representation, a.k.a. the letters and letter combinations that represent the 42 to 44 sounds of the English language and come together in specific sequences that make specific written words like shipwreck and kangaroo. Here are what sound cards and sound walls look like: By the way, the phonics program Jolly Phonics (developed in the UK) takes a sound-letter approach by using an expanded phonic sequence that includes all the sounds of the English language: s, a, t, i, p, n, c, k, e, h, r, m, d, g, o, u, l, f, b, ai, j, oa, ie, ee, or, z, w, ng, v, oo, y, x, sh, ch, th, qu, ou, oi, ue, er, ar. Interesting, right? And useful for teaching four to six year-old students many of the basic spellings of English language sounds. If you’re a teacher looking to transition from a word wall to a vowel and/or consonant sound wall, at the end of this post I've posted links to an informative article, a step-by-step sound wall construction guide, and three places to purchase sound cards. But first, a final thought. Students who have or may have dyslexia, often have difficulties processing the individual sounds of language (phonemes). This makes it difficult for their brains' to orthographically map letters onto sounds, as well as store word chunks and whole words in the spelling section of their brain dictionary (Wolf, 2008; Kilpatrick, 2015; Seidenberg, 2017). One way to support all students in spelling-phonics, but especially those who have or may have dyslexia, is to give them lots and lots of practice in analyzing phonemes and then associating those phonemes with letters and letter combinations through reading (decoding) and spelling (encoding). This may be one reason David Kilpatrick gives a shout-out to the LiPPS program (Lindamood-Bell) in his 2015 book. So, if you are a reading interventionist or Title I teacher working with students who have difficulties with automatic word recognition due to deficits in the phonological and orthographic processing areas, give some serious consideration to systematically teaching sound-letter associations with a sound wall! Here's a practical and helpful article about sound walls from one of my go-to websites, Reading Rockets:: www.readingrockets.org/article/transitioning-word-walls-sound-walls. Click this link for a step-by-step guide from Voyager-Sopris. Looking to purchase some sound-spelling cards to create a vowel and/or consonant sound wall? Here are some sources:
Citations
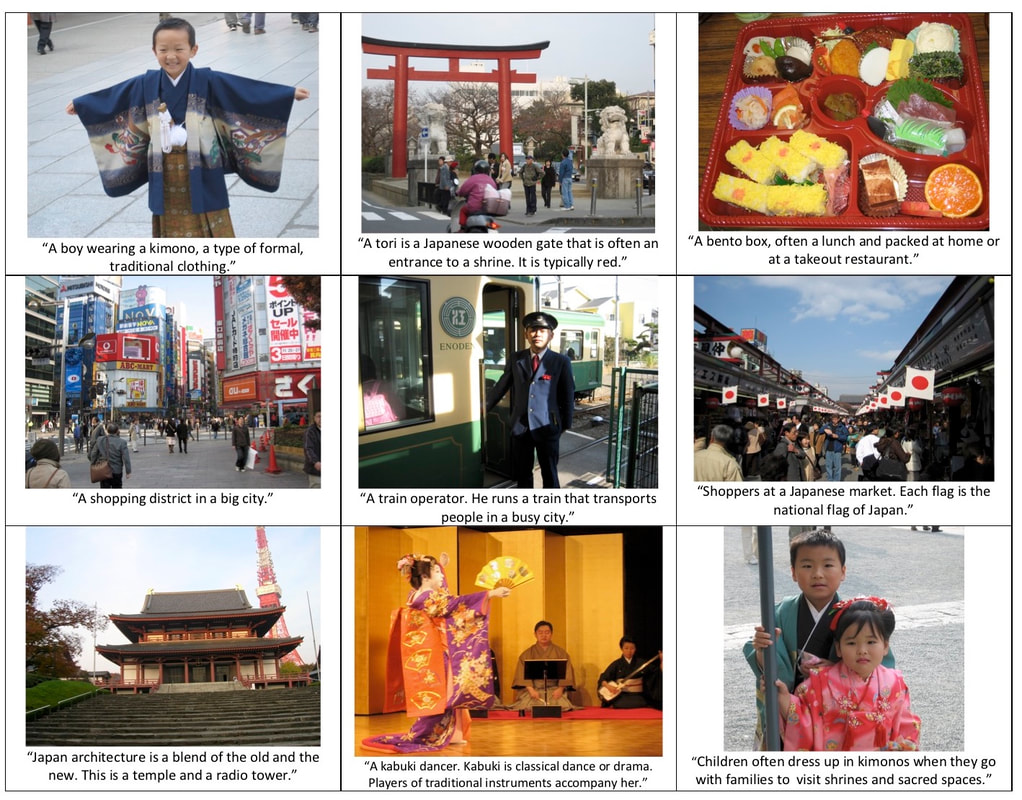
Language comprehension is fundamental to reading comprehension. Thus, it makes sense to help students build and strengthen it. The stronger a student’s language comprehension, the more deeply he or she will be able to understand written text. Here’s a classroom practices that builds and strengthens the components of language comprehension, specifically background knowledge, vocabulary knowledge, and topical knowledge. Use it prior to a introducing a theme, jumping into a unit of study, or tackling a story or chapter book. The Slide Show We all know the power of YouTube videos. In a matter of minutes, one clip can convey a lot of information. But my favorite activity for quickly communicating background and topical knowledge is a modern-day slide show. It imparts much more information than a video and is equally engaging. In the ancient days of my youth, slide shows were all about hardware. There were real slides (translucent film fitted inside a frame), a hard plastic carousel that stored them, and a slide projector that beamed light through the slides and onto a screen. Today’s slide shows, however, are software-based, made from digital images culled from the internet and pasted into a slideshow app. Unlike video clips, slide shows have no animation or narration, meaning you can create space for contemplation, letting students ponder a particular slide, asking questions about it, and soliciting comments. Set Up. To create a slide show, you need an app with a slide show function like PowerPoint or Keynote. You also need a way to get the images into the eyeballs of kids. This could be a projector and screen, a Smart Board, or even a laptop computer that, in non-COVID times, kids can huddle around. Finally, you need a strong sense of what you want to teach. Examples include a science unit on erosion, a reading genre like fairy-tales, or the setting for a story like One Crazy Summer (summer of 1968 in the city of Oakland, CA) or Owl Moon (the woods on a cold, winter night under a full moon). Once you have decided on your instructional focus, do a Google Image query and start sifting through pictures. Choose engaging pics that also tie into the words and concepts you want to touch upon in your upcoming story, theme, or unit. The trick is to pick information-rich photographs that both pique the interest of students and provide vocabulary and background knowledge. Next, import the pictures into your slide show app and make some brief notes (mental or written) about the information you want to impart as you show each picture. Now you’re ready to go. Modeling. It’s always a good idea to model the behaviors you want your students to exhibit. So, first model how to observe and notice. Using direct and explicit language, explain to students how to scan a picture. Then show them a photo and describe your observations, as well as defining select terms. vocabulary words. For example, this comment goes with the first slide in the figure below: “This boy is wearing a kimono. A Japanese kimono is a traditional kind of clothing. In Japan, people wear kimonos for special occasions.” Build in appropriately sophisticated language whenever possible and intersperse the noticing with questions. “What do you notice in this picture?” and “What do you think this picture is showing us?”
The slide show below could be used to build knowledge prior to reading books that reference Japan, such as Wabi Sabi by Mark Reibstein or Grandfather’s Journey and Kamishibai Man by Japanese-American author and illustrator Allen Say. Under each photo, I’ve included examples of what I might say to students as I show each slide. These comments are not part of the slides; during a slide show, I don’t show text to students. No matter the content, the big picture goal is to orally building language comprehension through showing pictures and verbally giving information. Slide shows can be as long or as short as you want them to be. However, if you make them too short, they won’t give enough information, and if you make them too long, you’ll eat up too much time and your students may lose interest. Keep in mind the age and attention span of the children you teach. A show of twelve to twenty photos is a length to aim for, and total time for the activity is less than 15 minutes. When to use. I recommend showing a slide show prior to reading a historical novel or any book with a setting unfamiliar to many students. The ultimate goal is to add words and associated meaning to a child’s mental lexicon. Then, when it comes time to read, this knowledge is available to the reader. If a picture is worth a thousand words, then a slide show with a dozen or more pictures really adds up! Final tips. Some photos generate more discussion and/or questions than others. If you notice that one of your slides is not engaging students or fostering discussion, take note of it so you can replace it with another picture at a later time. Also, team up with two or three other teachers, map out and list slide shows that would be useful in your grade level, and then divvy up the job of finding pictures and creating shows. If everyone swaps slide shows, you can create and store 10 or 12 of them without too much effort. In my worldview, everything from climate to culture arises from the interdependent nature of all things. Why should the reading process be any different? In fact, it isn’t. One of the many fascinating aspects of the act of reading is how holistic and emergent the process is. Breaking it apart helps us understand how it works but only when we consider it as a whole can we see its true nature. Kilpatrick’s Intervention Trio Reading disabilities expert David Kilpatrick references the interconnectedness of reading components in his 2015 book, The Essentials of Assessing, Preventing, and Overcoming Reading Difficulties, where he points out how all intervention approaches that lead to highly successful reading outcomes (i.e., weak readers gaining word reading skills at accelerated rates) have three things in common:
Restating Kilpatrick for the Classroom If Kilpatrick’s trio is capable of accelerating low-achieving readers to the point where they can catch their typically achieving peers, it stands to reason the trio is also capable of preventing reading difficulties from occurring in the first place. Reading researchers Barbara Foorman and Joe Torgesen say this very thing: “The components of effective reading instruction are the same whether the focus is prevention or intervention” (2001, p. 203). I have restated and slightly expanded Kilpatrick’s list into three general instructional practices. For me, they are guideposts for teaching reading in any primary grade classroom:
Residing Together If young students are to become readers, explicit and direct phonics–spelling instruction must be a daily occurrence. The same is true for opportunities to read connected text for extended amounts of time. But some students may require different content, type of instruction, and/or amount of teaching in each area. One effective way to accomplish this is to differentiate things like phonics–spelling instruction and book browsing bins, as well as the groupings, activities, and schedules associated with guided reading. This differentiation, however, should never reach the point where phonics–spelling instruction supplants guided and independent reading, leading to a situation where a group of struggling readers receives 45 minutes of phonics a day, minimal guided reading, and no time to independently read! For all students, and especially for those who struggle, phonics–spelling, guided reading, and independent reading should reside together. Citations
Recently a teacher asked me if I could recommend a grammar workbook for a struggling reader and writer who was being instructed both in-class and remotely. The student’s mother, wanting to help her child learn grammar at home, was looking for an easy to use grammar workbook. My reply to the teacher and parent began with a confession: I’ve never taught grammar with a workbook. Thus, I had nothing to recommend. Rather than workbooks, I believe grammar is best taught through authentic writing and reading. [If anyone reading this blog who knows of research that says otherwise, please let me know! Seriously.] While there is certainly a time and place for some isolated skill practice, grammar can be effectively taught within the realm of authentic writing and reading tasks. And even when it does come time for some drill-the-skill, teachers and parents don’t need workbooks. Modeling plus sentence writing will do. In this post I hope to explain my philosophy of grammar instruction, beginning with standards, moving to instruction, and ending with authentic reading and writing activities that allow students to employ the grammar they are learning. I also hope to show that we can use common sense to figure out what grammar standards to really focus on. If all goes well, kids will deeply learn a handful of grammar concepts super useful for mastering writing and reading. First, Standards If you’re going to teach grammar without a workbook or basal literacy program, you will need a quality grammar scope and sequence. Grade level standards can be a starting point. I am most familiar with the Common Core national standards but any reputable state standards will do. With grade level standards in hand, reflect on the needs of the student/child. Pick the level that is most appropriate for your whole group, differentiated small group, or an individual. For example, if you are a parent with a fourth grader and you feel she is missing a fair number of 2nd grade concepts, then teach 2nd grade grammar standards. Don’t worry that the standards will be age-inappropriate. When lower grade standards are taught to upper grade children through authentic writing and reading tasks, the tasks automatically present the concepts in an age-appropriate way.  Next, condense, re-state, and prioritize the standards My belief is that in each grade level, there are only a handful of grammar concepts that are vital to learn (and therefore teach). The ones that are vital increase a child’s ability to write excellent sentences and paragraphs. Additionally, they contribute to reading fluency and comprehension. To make teaching manageable, look for standards that say pretty much the same thing and merge and condense them. At the same time, re-state the standards in ways that make sense and directly connect them to real world tasks, i.e. writing and reading! Finally, put less practical, rarely used standards aside for the time. Here’s an example of my process using five Common Core Grammar Standards, 5th Grade CCSS.ELA-LITERACY.L.5.1.A
Of these five, I think 1.B, 1.C, and 1.D say basically the same thing. Additionally, 1.E can be put aside – it just isn’t that important for day-to-day writing. What is important? Using conjunctive and prepositional phrases; writers use them all the time to effectively convey information, organize thoughts, and engage readers. Writers also need to correctly use verb tense. So, after merging, culling, and re-stating, I have these two standards to teach:
It will take students quite some time to master these two standards.and so I’ll want to teach them repeatedly and in a distributed way. BONUS: Click on the File Cabinet tab at the top of this page (next to the Blog tab), look at the top left hand column, and click on the PDF that says Grammar Standards Reimagined. It's an example of how I condense, re-state, and prioritize grammar standards, in this case all of the Common Core Grammar standards, 5th grade. The first two pages of the doc are the actual standards. The third and fourth pages show my take on the standards – merged, restated, prioritized, and now useful and do-able!  Next, teach the vital standards through genre writing Using grammar concepts helps students become better writers. Conversely, writing helps them better understand grammar. Therefore, have students practice grammar in writing! What types of writing? Why the three genres, of course: narrative, informational, and opinion/persuasion. For example, let’s imagine I want to teach a student to use prepositions to create phrases that give information and add interest. First, I’ll model the concept within narrative writing. I can also model it within informational writing. Here’s a narrative example (prepositional and conjunctive phrases are in italics). On the weekend, I enjoy riding my bike. When I first start, I peddle slowly. Later I whiz along. I ride on winding country roads, up and down hills and along flat fields. When the weather is warm, I ride for two or three hours. When I am done, I am tired but happy. Now informational: Who is the king of the solar system? Jupiter! Jupiter orbits between Mars and Saturn, far from the sun. It is the largest planet, much larger than Earth. In most places, you can easily see this planet without a telescope. Not long after the sun sets, look for a brilliant point of non-twinkling light just above the horizon. Don’t forget about reading After students write pieces, they should read them multiple times out loud. Students can read their writing to see how it sounds and to find mistakes. Reading aloud is also great for sharing, showing others what good writing sounds like, and general enjoyment. Also, grammar can and should be discussed and understood within the context books and articles. Therefore, read books and articles to and with students and as you read, discuss a grammar element. Here is my merged and rewritten Common Core Grammar standard (5th grade) that speaks to this:
Finally, remember what types of instruction are most effective In a nutshell, first model everything, then guide students as they practice, and finally allow students to practice independently (I do, we do, you do). Here’s a bit more detail on this:
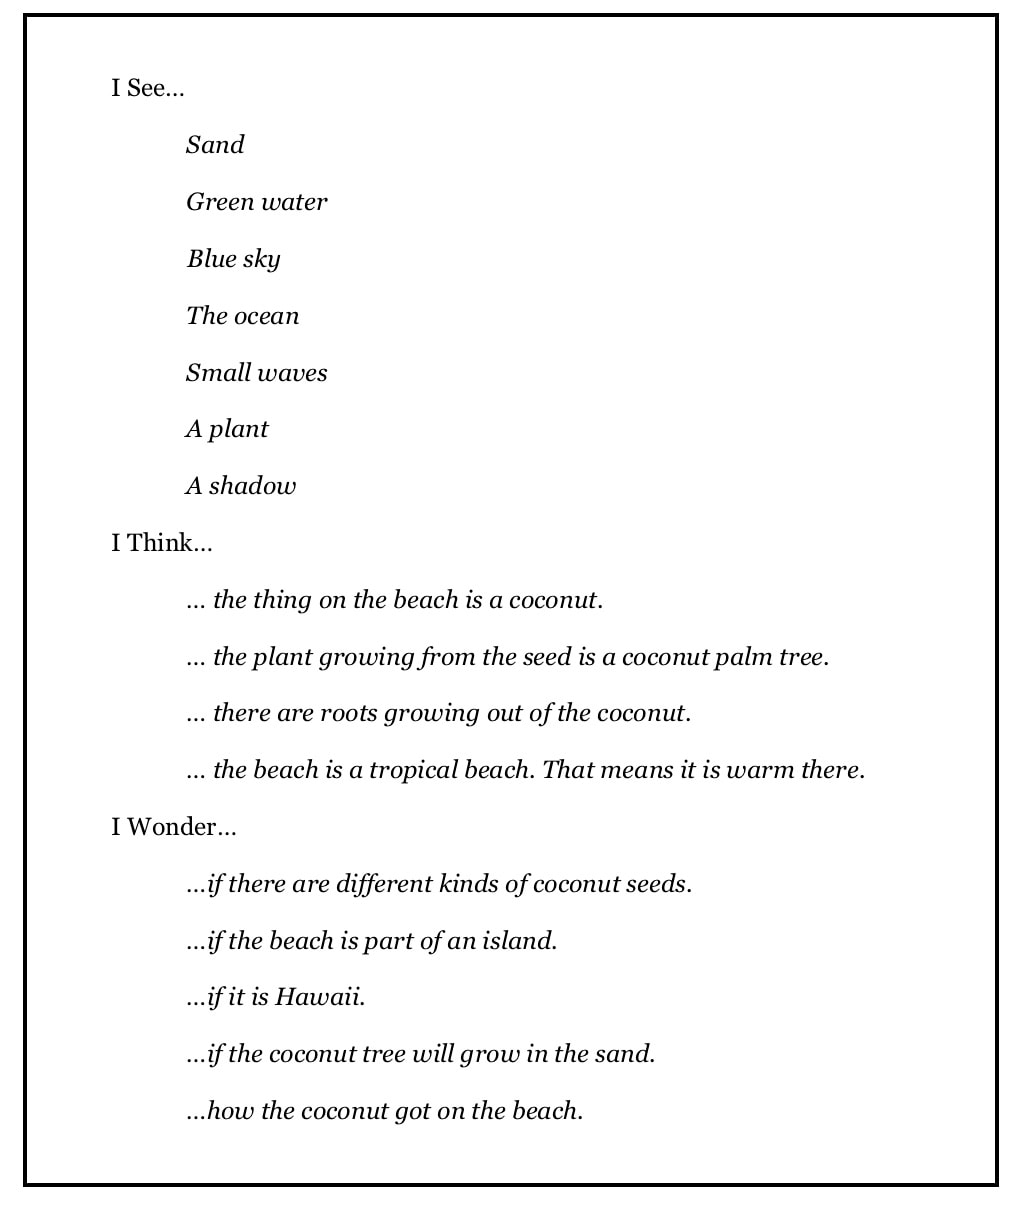
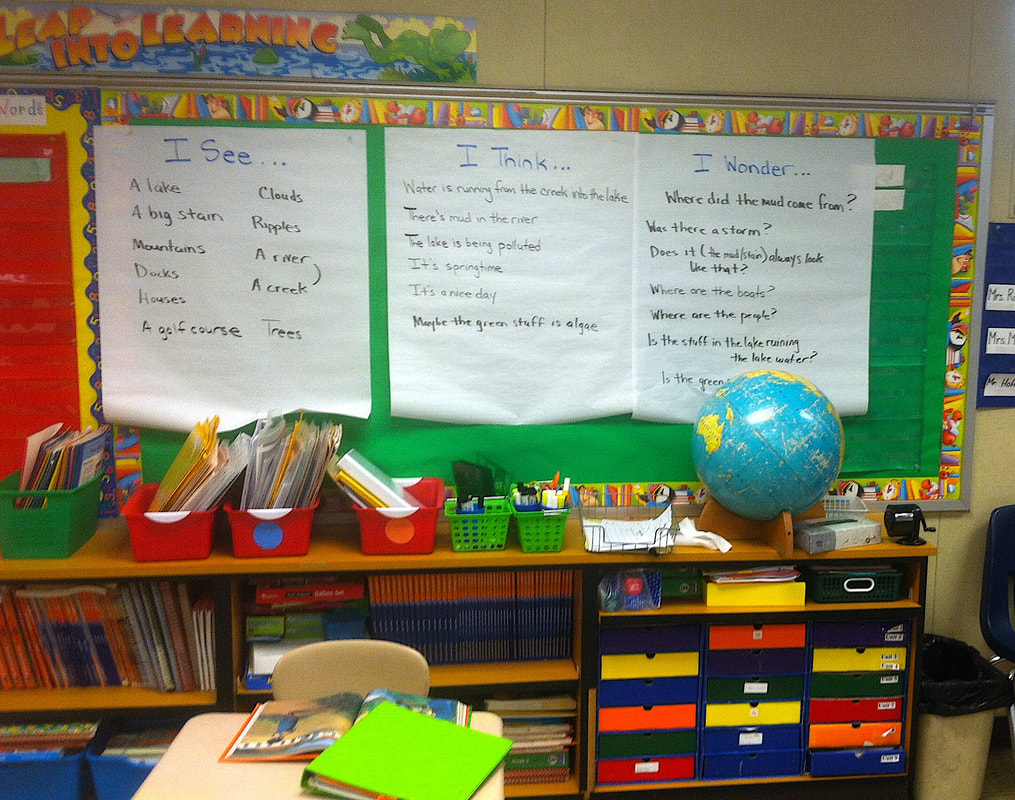
In my next post, I’ll give a simple schedule a parent or teacher could use might do for grammar teaching for the week. Meanwhile, don’t forgot about the bonus document in the “File Cabinet.” Happy writing and reading! My last blog post promised more easy-to-do activities; this post gives another one. But first, a brief recap of what language comprehension is and why it is so important to skillful reading. Reading arises when both word recognition and language comprehension are well developed and richly interacting. Neither is more than another; both are made up of multiple components. For example, the components of language comprehension include background and topical knowledge, vocabulary knowledge, an understanding of grammar and syntax, a grasp of metacognition strategies, and the ability to regulate your focus and employ your strategies. All of these, as well as the components of word recognition, must be firmly if skillful reading is going to occur. SEE, THINK, WONDER. See, Think, Wonder comes from Harvard University’s Project Zero, which promotes visual thinking. I was introduced to it while working with the wonderful teachers of Nicholas County, West Virginia, where many of them enthusiastically endorsed the activity, saying it did wonders (pun intended) for building background knowledge, setting the stage for learning, and helping students develop the ability to ask and answer questions. For all students, but especially young children and English language learners. it is an activity that builds oral language. For older students, it functions as both an activity and a reader-used strategy. Set up. As with the Slide Show, you will need a strong sense of the background knowledge you want to build. It could be a science theme like seeds and plants, a reading genre like biography, or a story setting like Mrs. Wade’s bookstore in Destiny’s Gift. Unlike the Slide Show, you’ll only need one picture. It could be scanned from your text, copied from an internet source, or pulled from an existing Slide Show. Or keep it super simple by opening up a book and sharing a big, bright picture with students gathered at your feet. Regardless of how you present it, pick your picture carefully. You’ll want it to be closely aligned to your story or theme, detailed enough to produce lots of language through discussion and questioning, and not too far beyond what they know and understand (their general background knowledge). Modeling. To teach it, begin with a think aloud. Show the picture to your students and tell them what you see. Be as concrete as possible and use “I see…” statements. Next, move to “I think…” statements. Finally, model “I wonder…” statements. Here’s an image that could be used to kick off any first grade science unit on the structure of plants. It’s also appropriate for introducing a story like A Seed is Sleepy by Sylvia Long or Up in the Garden, Down in the Dirtby Kate Messner. And here’s an example of language a teacher might use when modeling a See-Think-Wonder based on the picture. Guided practice. Once you have modeled the strategy, move to guided practice with the whole group. Show an appropriate picture, give your students 10 seconds to notice things in the picture (like a detective looking carefully for clues), and then randomly call on individuals to tell you one thing they see. Don’t let them tell you everything they see, as some will try to do. Teach them to share one observed item at a time.
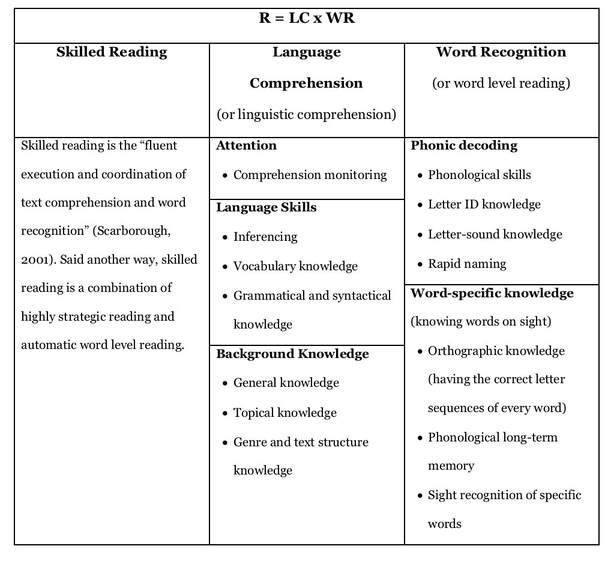
After you have modeled this strategy with the students and then guided them through it as a whole group, put them into groups of 2, 3, or 4 and have them try it for themselves. I’d suggest you just allow them to talk at first, rather than writing it down in three columns or completing some type of worksheet. Writing can come in later, when older students have a much firmer grip on using the strategy (see Figure 4.5). Also, writing everything down can be laborious for some students, while talking can be enjoyable, so why not give kids time to talk via an educational activity? Meander among the groups and listen to the talk, nudge into line any groups or individuals that are straying from the topic, and positively reinforce those groups and individuals who are exhibiting behaviors that are appropriate to the task. Later, spend a few minutes back in the whole group for a debriefing session. You can point out comments that were especially pertinent and provide praise for those who expended excellent effort. When to use it. See-Think-Wonder is both an activity and a strategy. As an activity, it builds language comprehension. Promoting “See-Think-Wonder” as something students do prior to independent reading turns it into a strategy that sets the stage for learning, activates prior knowledge, and generates questions that increase engagement. For example, this might take place in a guided reading group, when you hand out books, talk about the title, and then say, “Do a picture walk through this book and ask yourself, ‘What do I see, what do I think, what do I wonder?’” Likewise, explicitly show a whole group how to use it prior to reading science or social studies text. Say things like, “Good readers take the time to see, think, and wonder about the pictures, maps, and diagrams in the books they read. We are practicing this strategy so that you can use it independently. When you use this strategy, you become a reader who understands more." First, A Bit of Background Knowledge To become a skilled reader, a child must master sound-letter combinations, combine letters into phonic “chunks,” automatically recognize words, link words to specific meanings, make connections between text ideas, understand genre, integrate background and topical knowledge, employ strategies to stay on task, and much more. In previous blog posts, I’ve tried to describe and explain how this complexity interacts in a process that ultimately gives rise to skillful reading, and I’ve used two reading models to do so: the Eternal Triangle and the Simple View of Reading. The Simple View of Reading, expressed as a formula, R = WR x LC, tells us skilled reading arises when both word recognition (WR) and language comprehension (LC) are well developed and richly interacting. It’s important to note the formula does not emphasize one variable more than another; the focus of this blog, language comprehension, is just as important to skillful reading as word recognition (or decoding) is, and this means teachers of reading must know how to 1) build it in all students, 2) assess how much of it students possess, and 3) differentially target and teach students who lack any of its specific elements. Each of the Simple View’s variables – decoding and language comprehension - are made up of multiple components. Compiled from the writings of Hollis Scarborough and David Kilpatrick, the chart below provides a summary of many of them. Ironically, the Simple View of Reading is not simple! Nonetheless, Scarborough and Kilpatrick can help us in our quest to understand what we must teach if students are to learn how to read and avoid reading difficulties. A Simple But Effective Activity Now that we have some background knowledge on language comprehension, let’s dive into the nuts and bolts of how we might strengthen it in students, be they first, fourth, or even ninth graders. I have three language comprehension activities to share and I’ve chosen them because in COVID times, they can be done either in a classroom or online. Also, all are relatively easy to do (once you learn their routines) and in sum they present multiple components of the language comprehension variable. This post describes and explains the Slide Show. In upcoming weeks, I’ll give See-Think-Wonder and the Interactive Read Aloud. The Slide Show We all know the power of YouTube videos. In a matter of minutes, one clip can convey a lot of information. But my favorite activity for quickly communicating background and topical knowledge, as well as building vocabulary, is a modern-day slide show. In the ancient days of my youth, slide shows were all about hardware. There were real slides (translucent film fitted inside a frame), a hard plastic carousel that stored them, and a slide projector that beamed light through the slides and onto a screen. Today’s slide shows, however, are software-based, made from digital images culled from the internet and pasted into a slideshow app. Unlike video clips, slide shows have no animation or narration, meaning you can create space for contemplation, letting students ponder a particular slide, asking questions about it, and soliciting comments. Set Up. To create a slide show, you need an app like PowerPoint or Keynote, one that has a slide show function. You also need a strong sense of the concept or content you want to teach. Examples include the idea of erosion, a reading genre like fairy-tales, or a specific story setting, like a farm in Wyoming (Stone Fox), the summer of 1968 in Oakland, California (One Crazy Summer), or the woods on a cold, winter night under a full moon (Owl Moon). After you have decided what to teach, do a Google Image query and start sifting through pictures. Choose engaging ones that also tie into the words and concepts you will touch upon in your upcoming story, theme, or unit. The trick is to pick information-rich photographs that both pique the interest of kids and provide talking points for vocabulary and background knowledge. Next, import the pictures into your slide show app and make some brief notes (mental or written) about the information you want to impart as you show each picture. Now you’re ready to go. Modeling. It’s always a good idea to model the behaviors you want your students to exhibit, so first model how to notice things on each slide. Using direct and explicit language, explain to the children what they are seeing in each picture and give definitions for vocabulary words, like this one, which goes with a slide in the figure below. “This boy is wearing a kimono. A Japanese kimono is a traditional kind of clothing. In Japan, people wear kimonos for special occasions.” Build in appropriately sophisticated language whenever possible and intersperse the noticing with questions. “What do you notice in this picture?” and “What do you think this picture is showing?” The slide show above could be used to build knowledge prior to reading books that reference Japan, such as Wabi Sabi by Mark Reibstein or Grandfather’s Journey and Kamishibai Man by Japanese-American author and illustrator Allen Say. Under each photo, I’ve included examples of what I might say to students as I show each slide. These comments are not part of the slides and I don’t show text to students. No matter the content, the overarching goal is to orally build language comprehension through showing pictures and giving information verbally.
Slide shows can be as long or as short as you want them to be. However, if you make them too short, they won’t give enough information, and if you make them too long, you’ll eat up too much time and your students may lose interest. Keep in mind the age and attention span of the children you teach. A show of twelve to twenty photos is a length to aim for, and total time for the activity is less than 15 minutes. When to use. I recommend showing a slide show prior to reading a historical novel or any book with a setting unfamiliar to many students. Earlier I mentioned Stone Fox, a chapter book about a sled dog race. Before my 3rd grade guided reading group began this book, I showed them a slide show that included pictures of racing sleds, sled dogs, mushers, homestead farms, a map of Wyoming, and various types of people you might see in Wyoming, both current and historical. Although the students and I could have talked all morning about the pictures (the kids were into them, especially the ones featuring dogs), I set a time limit of 15-minutes because it was also important to start reading. It can be tricky to find the right balance between too little and too much discussion but with practice, you’ll figure out what works best. The ultimate goal of a slide show is to build a child’s language comprehension by adding background, topical, and vocabulary knowledge to a child’s mental lexicon. Then, when it comes time to read, this knowledge is available to the reader. If a picture is worth a thousand words, then a slide show with a dozen or more pictures really adds up! Sources and Citations
Home and School Spelling Activities for Beginning Readers (Part 2): Spelling and Reading Patterns8/19/2020
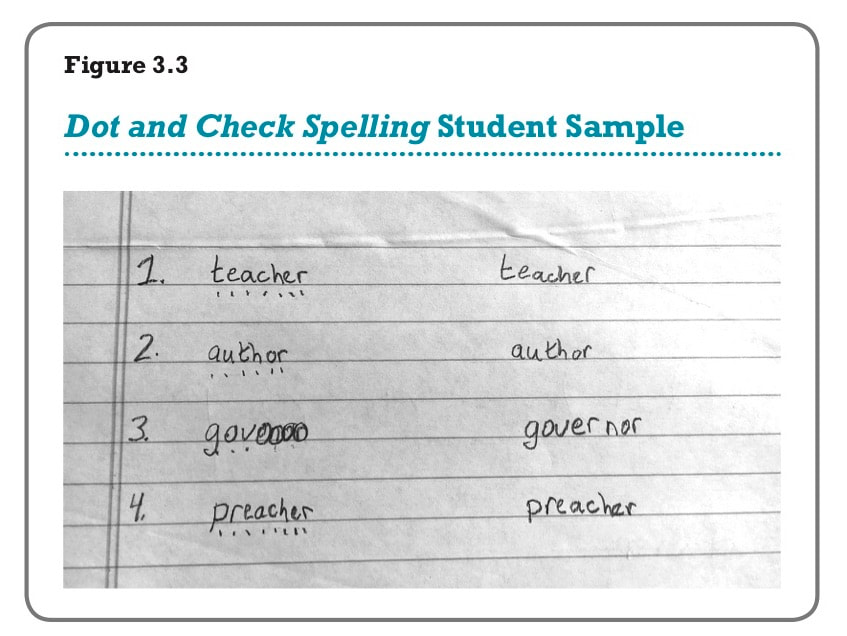
When I first started to present workshops and trainings, I often told teachers my two classroom mantras were “read, read, read” and “write, write, write.” Reflecting on my instruction at the end of a teaching day, if I felt I had given my students many opportunities to read and write, then I knew my instruction was on the right track. After deeply diving into brain-based reading, however, I’ve added a third teaching mantra: “Patterns, patterns, patterns!” Studying Patterns and Building Words Once students have mastered sound-letter associations, such as the sound /b/ is represented by a B and /sh/ is represented by the S-H digraph, they are ready to begin exploring larger patterns called phonograms, often called word chunks or word families. From this point on, I will use the terms interchangeably. Typically, word families are presented at the rime level, which is the part of a one-syllable word that stretches from the first vowel to the end of the word. For example, the rimes of bake, ink, home, and clump are ake, ink, ome, and ump. Patterns are terrifically important because they move children toward whole word reading and spelling. Teachers who teach pattern recognition hijack the brain’s natural ability to recognize patterns. But don’t worry, this hijacking is a positive act. When we teach students to notice patterns, we help them see how words are made up of and relate to one another through predictable chunks. Keeping one chunk the same (the rime) but changing its initial letter or letters (the onset) produces a list of words that rhyme. Also, when students engage in activities that focus on letter patterns and their associated sounds, they may be more likely to recognize the chunk in other written words (which helps them to decode), as well as hear the sound chunk in words they want to write (which helps them to encode). Researchers Wylie and Durrel famously showed that some word families are more common than others (Wylie & Durrel, 1970). They referred to these families as phonograms. Figure 6.8 gives a list of the 37 phonograms they identified as most common. The list is an excellent starting point for phonics-spelling instruction in the primary grades. 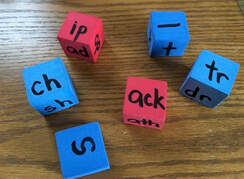 Activities that show how words work at the pattern level take many forms. My favorites involve manipulation, especially manipulation of materials that are easy to store, transport, and clean up afterwards. All the following activities can be easily made; many can be purchased. When you first introduce an activity, model its use. Then model it again! If you don’t have enough materials to run the activity for a whole group, consider pairing the kids (with each pair getting a white board, egg carton, magnetic journal, etc.) or using the materials only in small group settings or in a word work center. Foam blocks. You will need two sets, one set with phonograms or families such as ack, ain, ill, and ot, and one set with consonant and consonant blends, like d, g, br, and fl. Students work in pairs. One student tosses each block and puts the blocks together to form a word. It might be a real word; it might be a nonsense word. The other student reads the words. Next, the students reverse roles. You can buy blank blocks as well as blocks printed with onsets and rimes from online vendors such as Oriental Trading Post or your local craft store. 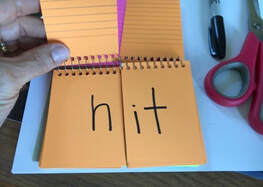 Flip books. Flip books have two sections, one comprised of onsets and one of rimes. The first flap is the onset (consonants and consonant blends), the second flap is the rime. Students create words by flipping the pages and reading each combination. Sometimes the words are real (bake, cake, flake, stake) and sometimes not (dake, glake, prake). Onset-rime flip books can be purchased, but it’s easy to make them; all you need is a spiral bound book of index cards. Cut the cards down the middle, write in the onsets and rimes with a marker. Card books in colors (yellow, green, blue) let you categorize the rimes: yellow for vowel-consonant-E (lake, lade, lime), pink for vowel teams (steam, stow, stay). Students can work and read on their own or in pairs (one flipping and one reading). 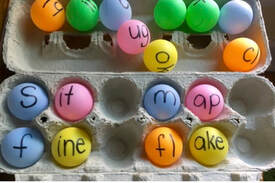 Ping pong balls in egg cartons. The balls typically can be purchased in bulk for under $15 and are available in various colors. You could buy two colors, one for onsets (like t, s, p, gr, sh, fl) and one for rimes (like ame, ill, est, ore, and unk). You’ll also need a sharpie and an empty egg carton. Organize the onsets and rimes in ways that are most beneficial to your students. (See Figure 6.8c.) Students pick one onset (t) and one rime (ame) and then pair them to make a word (tame). Next they read the word. Then they either swap in a new onset (sh to make shame), bring in a new rime (est to make test) or put both balls back and build a completely new word. 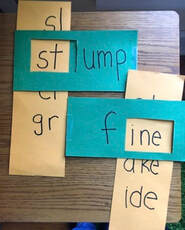 Wheels and sliders. Students turn the wheel or slide the slider to form new words and then read the words. Wheels and sliders can be purchased but you can also make your own with colored cardstock and round-headed brass fasteners. Personal white boards.
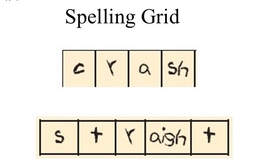
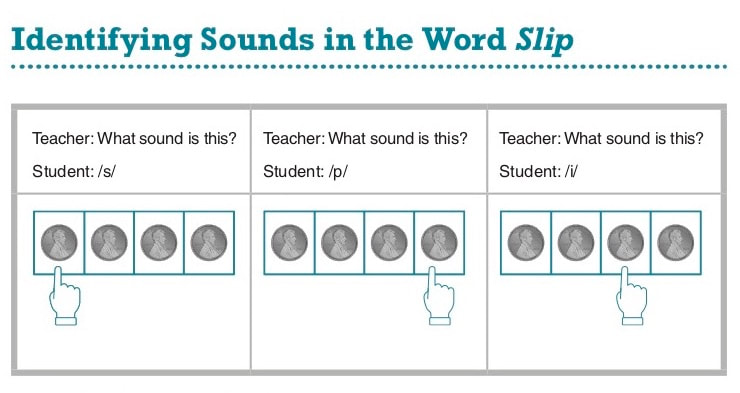
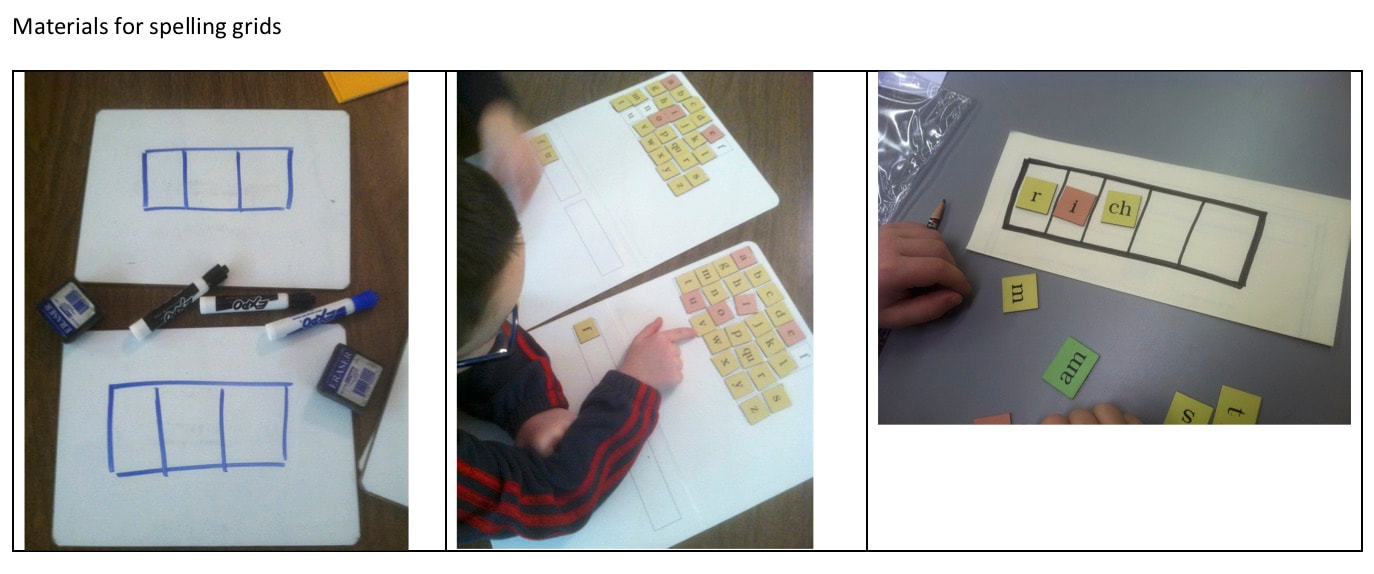
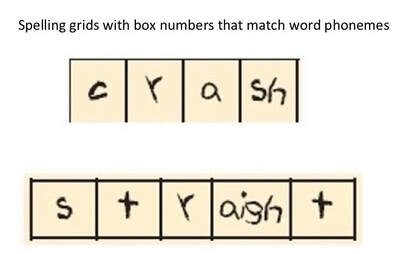
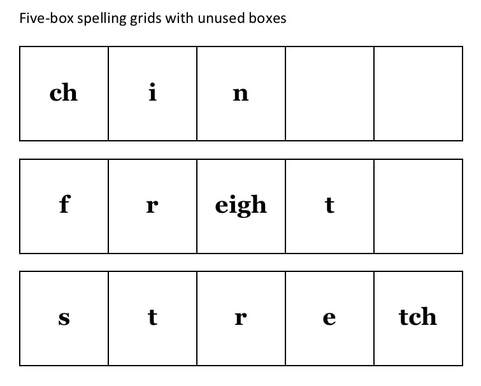
On their board, students write down the target rime and then spell and read words by swapping beginning letters in and out. If you want to make your own board, go to Lowe's or Home Depot and buy a 4 x 8 sheet of white panelboard, from which you can get twenty-four 12 x 16-inch rectangles. If you ask nicely, it's a good bet someone at the store will cut the pieces for you right then and there. Take the pieces home, sand the edges with fine sandpaper and boom, you have 24 white boards for less than a buck a piece! Every day I find myself thinking of teachers and the difficulties they will face this fall. In the best of times, educating students is a tough thing to do. In the midst of a pandemic, and with large swaths of our government and populace not effectively responding to it, the challenges seem overwhelming. Still, I know teachers everywhere are taking steps to learn how to teach online, finding ways to keep themselves and their students safe in classrooms, and getting on with the business of teaching children to read, write, and do arithmetic. With that in mind, this post offers thoughts and ideas for teaching beginning readers using foundational reading activities that can work in school and hopefully at home. In February, my post focused on building phonological skills to an advanced level. To do this, teachers use classroom activities that move young students towards advanced phonological awareness, from large chunks of sound like syllables to the smallest bits, phonemes. This post explores ways to connect those syllables, rimes, and phonemes to the letter sequences that represent them. The end goal is to build the lexicon of words, “the brain dictionary,” that all children use to read and spell. Segment to Spell spelling grids Activities such as pushing and pulling pennies in and out of sound boxes (Elkonin boxes) can be used to teach students phonemic segmentation, blending, and manipulation. In Segment to Spell, these boxes are repurposed to hold the written letters and letter combinations that represent individual phonemes. In this way, students can be taught the alphabetic principle: sounds can be represented by letters, letters represent sounds. Letter boxes (or spelling grids) help students segment the sounds of words and then spell each discrete sound with an appropriate letter or letter combination. Grid activities like Segment to Spell are typically used with the youngest readers and writers but they’re also appropriate for older students who haven’t mastered the alphabetic principal, especially regarding vowels. I used letter boxes frequently when teaching general education classrooms of third graders who were reading below grade level. Outside of specific programs, spelling grids can be purchased as whiteboards (for writing) or magnetic boards (for manipulating magnetic letter tiles). You can also make your own write-and-erase spelling grids by printing grids on card stock and laminating them or drawing them on white boards with permanent marker. These inexpensive options could be sent home for use with remote teaching. Finally, you can go the worksheet route, giving students a printed sheet with 3 to 4 spelling grids on each side and then having them pencil in their letters. Each box in a spelling grid represents one phoneme. Students listen to a word, segment the word into individual phonemes, and then fill in the boxes of the grid with the letter or letters that spell each sound. Students in various stages of spelling and reading development can use spelling grids. Young ones might use three-box spelling grids to spell CVC and CVCC words such as sip, bat, rich, and lock. Older students with more advanced vocabulary and/or knowledge of spelling patterns might use the same three-box grid to spell gaff, church, and thought. When leading a group of students through this activity, support them by telling them upfront how many boxes will be filled. For young children, use grids with a prescribed number of boxes. For example, give only three box grids when presenting three phoneme words (like pen, fit, and porch). For children who have advanced to the next level of understanding, use a single grid with five or six boxes. Allow these students to decide how many boxes they will fill to spell any given word. Reinforce that the first sound goes in the first left-hand box and that not all boxes on the grid may be filled. For example, in a five-box grid, the word chin fills just three boxes, freight uses four, and stretch uses all five. Some teachers don’t like to see empty boxes at the end of a spelling grid. Others, like myself, don’t mind. Here’s a suggestion for a teaching routine:
Another option is for students to stretch the word and then segment by pushing up individual sounds one at a time (as if they were using invisible pennies). Each time a sound is pushed into the box, the student immediately writes the letter or letters representing the sound. Visit my YouTube channel, Mark Weakland Literacy, to find video examples of many of these activities. bit.ly/MWLit_YouTube_Channel 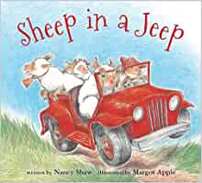 I was contacted recently by a Title I coordinator with a question: “What is meant by real, connected text?” The coordinator, currently working with her teachers to research and then restructure their district’s reading interventions, asked the question with regards to a point made by David Kilpatrick in his 2015 book, Essentials of Assessing, Preventing, and Overcoming Reading Difficulties, namely, and I’m paraphrasing here, that effective reading interventions share the following:
Because reading research tells us “the components of effective reading instruction are the same whether the focus is prevention or intervention” (Foorman & Torgesen, 2001), we know Kilpatrick’s trio is just as important to classroom reading instruction as it is to reading interventions. But what, exactly, is meant by real, connected text? How much time should students be given to read it? And in what settings are the various types of text appropriate? I’ll tackle the first question this week and the last two later in August. What is real, connected text? Defining educational terms is challenging. Our field seems to constantly create, redefine, and deconstruct its vocabulary but rarely discards any of it. Still, I’ll try to give a definition, starting with the “connected” part of the phrase. I take connected to mean multiple sentences, contiguous on a page or presented over pages, relating to each other in ways that ultimately tell a story or present cohesive information. These sentences, a.k.a. connected text, can be found in:
Authentic text Unlike the term “real text,” authentic text has been repeatedly defined by others. Here’s what the Florida Department of Education, which says: “Authentic text may be thought of as any text that was written and published for the public… written for “real world” purposes and audiences: to entertain, inform, explain, guide, document or convince” (FLDOE, 2020). Educators like Scott Thornbury and Lesley Morrow also weigh in, saying “…text is authentic if it was originally written for a non-classroom audience” and “[authentic text is a] stretch of real language produced by a real speaker or writer for a real audience and designed to convey a real message” (Thornbury, 2008; Morrow, 1977). An example of text most would classify as authentic is Nancy Shaw’s entertaining Sheep in a Jeep, a picture book featuring simple sentences of varying structure; colorful, active illustrations; a plethora of phonic patterns; and a variety of engaging verbs (go, yelp, push, grunt, shove, leap, splash, thud, shout, cheer) which provide the reader with, as Catherine Snow puts it, “rare and sophisticated” vocabulary. Although teachers and parents can use this text to expose children to language and teach concepts (sequence, verbs, using context to gain meaning, and so forth), the book was not originally written with teaching in mind. Definers of "authentic text" often go beyond books to classify blogs, novels, pop songs, newspaper articles, recipes, and road signs as authentic. Some also include radio shows, podcasts, photos, and video clips as examples. For me, podcasts and video clips won’t contribute much to teaching students the fundamentals of how to read written words and so I’ll put them aside. And while environmental text certainly helps children understand that text is an integral part of the world, I don’t think it is a central tool of K-3 reading instruction. So, in the end, I define connected, authentic text as text 1) that features connected sentences over one or more pages, 2) is not created for instructional purposes, and 3) is one of the main tools for fundamental reading instruction, K-3. Varieties of text that work within this general definition are poems and rhymes, picture books of all kinds, and chapter books, simple and more advanced, both narrative and informational. Once again, many of these types of texts can exist in digital format although I think the science of how well digital text works to teach reading is still in its infancy (and there are many unanswered questions). A broader definition of “real and connected” My sense is that Kilpatrick’s real and connected is a bigger category than authentic. Thus, in the file drawer labeled "real and connected," I’ll include books written specifically to help children learn how to read. Here I am thinking of the leveled books and predictable (pattern) books often used in kindergarten and 1st grade instruction. Leveled text Unlike authentic text, leveled readers are written with instruction in mind. Typically they support young readers with controlled vocabulary, a measured number of words in a sentence, and sometimes a repetitive sentence structure. For example, the first four pages of an early leveled reader might be this: 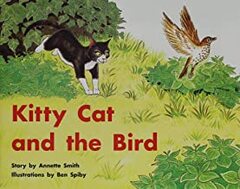 These types of books also fold in supports typically associated with picture books, such as photographs and illustrations. Also like authentic books, these texts present children with multiple, relating sentences in a book form (with title, cover art, and illustrations) that often tells a story or gives topical information. Finally, I’ve found that young children are excited when they finish one of these contrived texts and the excitement that springs from their reading success is a very real thing. 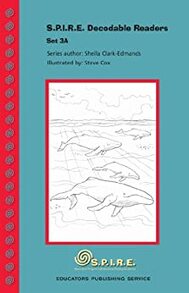 Text written with teaching in mind Other pieces of text I categorize as “real and connected” are the informational articles and short, fictional stories found on sites like Readworks.org. Specifically authored for a website or program, these passages are written with reading levels and teachable content in mind. Like leveled readers, they typically have measured vocabulary loads, controlled sentence structure, and confined sentence lengths. Even with their constrained writing, these informational passages and short stories seem real to me (and almost authentic) because they closely follow text forms (newspaper articles, short stories in magazines) that are written without instruction in mind. Is decodable text real? Writers create decodable text with a narrow teaching focus in mind: giving beginning readers practice in breaking the code through carefully constructed sentences that use a small number of phonic patterns. The construction of decodable text consistently points students towards the strategies of “look at the letters,” “look for patterns” and “sound out the word.” This is why decodable sentences and paragraphs are an important part of many curriculums, such as Barton Reading and Wilson Reading among others, that aim to help students who have dyslexia. By using a limited number of phonic patterns, decodable text gives students who need it more repetition and distributed practice in phonic decoding, and fosters literacy development by helping beginning readers build detailed and accurate replicas of patterns and words in neural circuitry (Shaywitz, 2020; Duke, 2019). 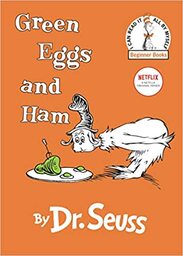 Because decodable text is written by authors who use very narrow parameters to accomplish a specific task, some may see it as the opposite of real or authentic. But I’d say it becomes more real and authentic if it makes sense as a story and builds topical, background, and vocabulary knowledge (Hiebert, 2020). In my mind, the best example of highly controlled text that is real, connected, and perhaps even authentic is Dr. Suess’s Green Eggs and Ham. After using only 225 different words to tell the tale of The Cat in the Hat, Suess’s editor bet him he couldn’t write another book using fewer. He did, using only 50 words to write Green Eggs and Ham. A classic in the world of children’s literature, this highly controlled text features memorable characters, humor, conflict, resolution, and character growth. Use it all to read, read, read In the end, all of this might be mere semantics. The big idea is to get kids to read, read, read! No matter what text you have available, do your best to program opportunities for children to read. It's best when students are reading everything and anything, from traffic signs and recipes to poems, website articles, graphic novels, and picture books. Give more support for those who need it. For example, if some students need more practice in breaking the code, give them additional opportunities to read decodable text. But don’t forget to also give them rich, authentic children’s literature. Support all students through read alouds and a kick butt classroom library laid out in browsing bins. No one type of text will teach all children to read and certainly you can’t teach all children with only one reading textbook! In my next blog I’ll discuss programming time to read all types of text, every day and for long periods of time. Sources / Citations
|
Mark WeaklandI am a teacher, literacy consultant, author, musician, nature lover, and life long learner.
|


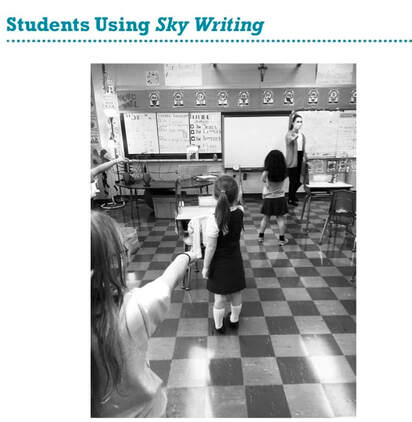

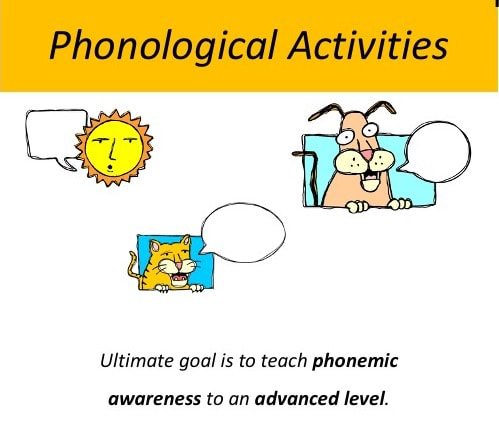



 RSS Feed